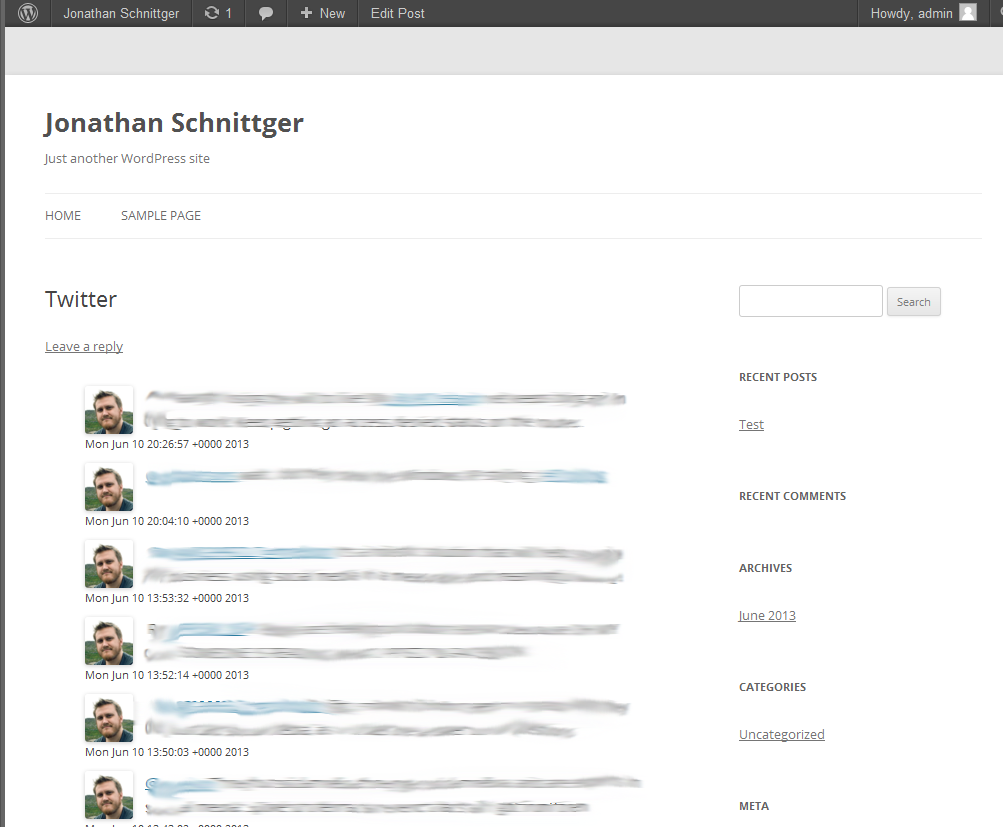
Building on the last few WordPress related tutorials, this week we’ll being using the Twitter API to display a users most recent tweets using a shortcode. Several of the existing tutorials and code examples out there use the old version of the API or the search API that do not require authentication. This API has been deprecated and been replaced with version 1.1. Although it still works, Twitter can disable it at any time.
One of the main changes to the API with the introduction of the 1.1 API was the implementation of rate limits and most importantly the change from OAuth 1.0 to OAuth 2.0 for authentication. OAuth 2.0 is very different to version 1.0, it is a much more streamlined process and is substantially easier to use.
Getting Started
To actually use the Twitter API you must sign up for a Developer account, this can be done here. Once you’ve signed up, you can start creating applications.
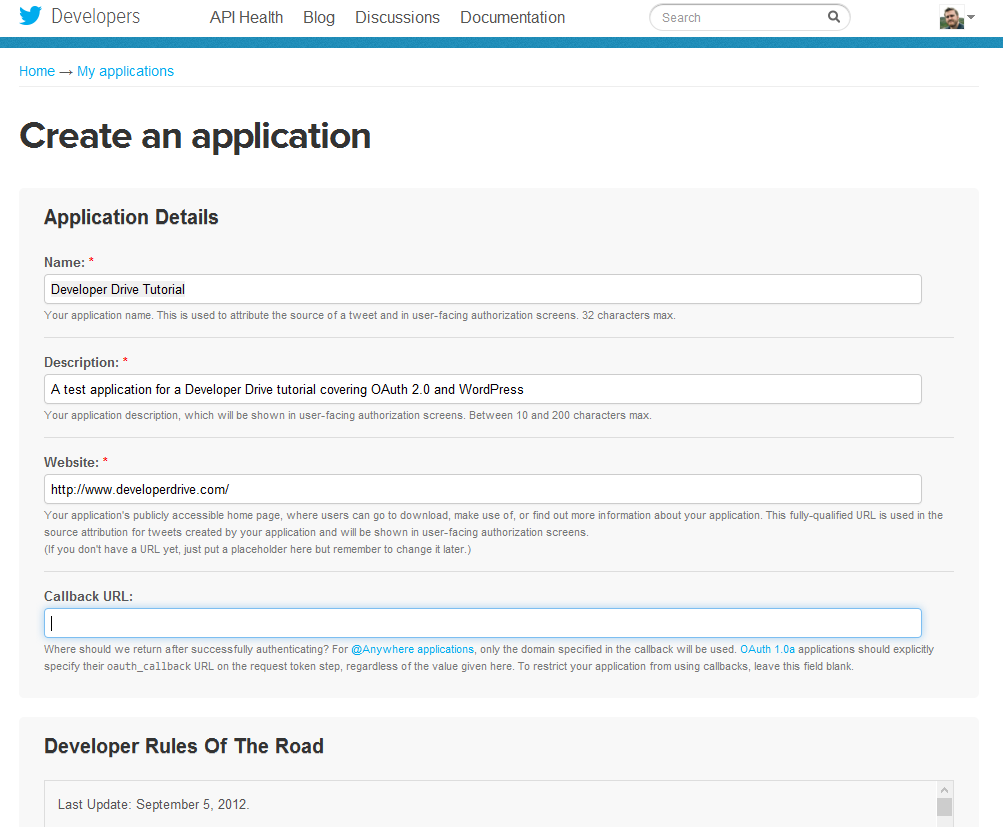
When an application is created, 2 random keys are generated. These keys the “Consumer Key” and the “Consumer Secret” are used to authenticate your application and any requests it make. Now that we have our 2 keys, we’ll need to be able to store them for use in our WordPress install. Some of this has been covered in my previous tutorials, so if I cover any of the topics too quickly, please check them out.

Creating our class
As with previous tutorials, we’ll be using PHP Object Orientated Programming. This week, we won’t be dealing with static methods and we’ll be taking advantage of the __construct method. The __construct method is executed when a class is initialized along with any code inside the method.
class OAuth2_Example {
    public function __construct() {
    }

    public function add_twitter_admin_menu() {
    }

    public function add_twitter_admin_page() {
    }

    public function twitter_authenticate($force = false) {
    }

    public function render_shortcode($atts) {
    }

    public function enqueue_twitter_style() {
    }
}

$oauth = new OAuth2_Example();
The __construct is where we will initialize and register our plugin methods for WordPress. First, we will need to register our shortcode, to do this we use add_shortcode, we also want to add an Admin menu item and settings page to configure the plugin. To register the menu item we use the add_action and take advantage of the admin_menu hook. We’re also going to register a CSS stylesheet for styling our twitter feed and admin page. Using the add_action function again, this time we use the wp_footer hook.
class OAuth2_Example {
    public function __construct() {
        add_shortcode('tweets', array($this, 'render_shortcode'));
        add_action('admin_menu', array($this, 'add_twitter_admin_menu'));
        add_action('wp_footer', array($this, 'enqueue_twitter_style'));
    }

    public function add_twitter_admin_menu() {
    }

    public function render_shortcode($atts) {
    }

    public function enqueue_twitter_style() {
    }
}

$oauth = new OAuth2_Example();
As you can see, in each of the WordPress methods above we are passing in an array of values. The first value is a reference to the current instance of the class, and the second is the name of the method we want to register with the action.
array($this, 'enqueue_twitter_style')
Adding our settings page
Now that we have our basic class defined we can start work on our admin page. In the add_twitter_admin_menu method we will register our page using the add_options_page function. We’re also going to ensure that the CSS is loaded for the settings page as well. To do this we’ll use the add_action and admin_print_scripts hook
public function add_twitter_admin_menu() {
    add_options_page('Twitter Options', 'Twitter', 'manage_options', 'twitter.php', array($this, 'add_twitter_admin_page'));
    add_action( 'admin_print_scripts', array($this, 'enqueue_twitter_style'));
}
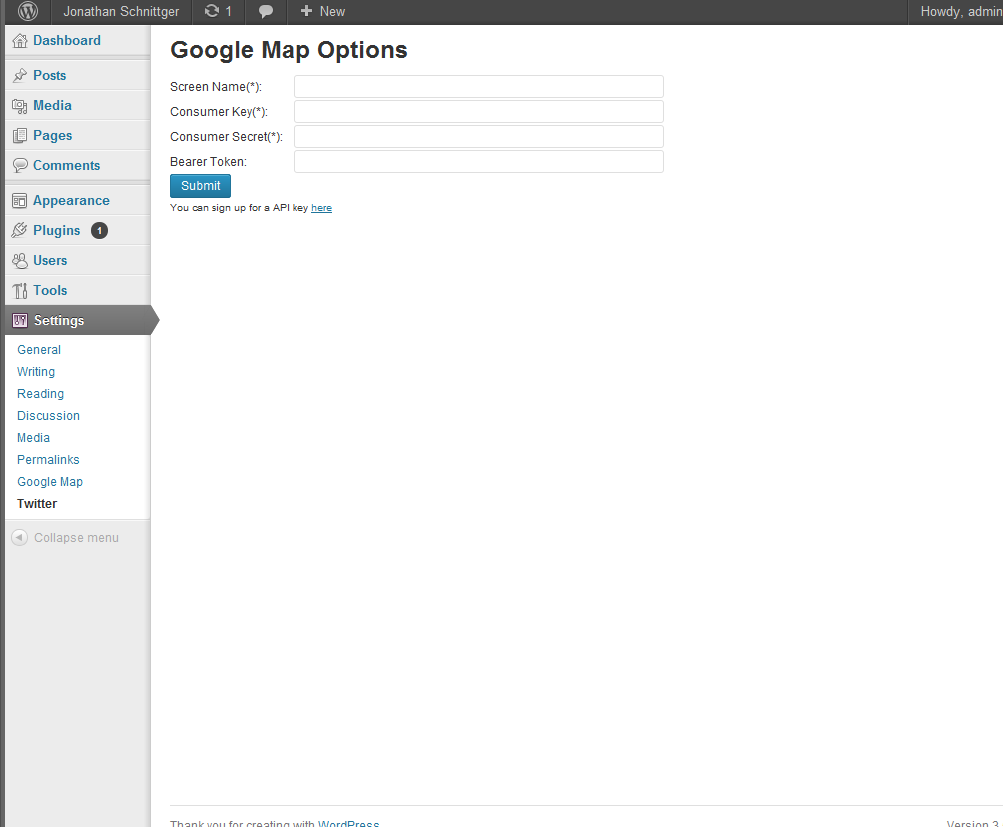
Now we have to define our settings page, the function is made of 2 parts. The first checks to see if this is a POST request, and if it is attempts to parse out and save our settings using the $_POST variable and the update_option function. The second part, outputs the form and the current setting values using the get_option function. Here we default the value of each option to an empty string. At the end of the form, we echo out our shortcode using the do_shortcode method
public function add_twitter_admin_page() {
if ( !current_user_can( 'manage_options' ) ) {
wp_die( __( 'You do not have sufficient permissions to access this page.' ) );
}
if ( $_SERVER["REQUEST_METHOD"] == "POST" ){
update_option( 'TWITTER_CONSUMER_KEY', $_POST['consumer_key'] );
update_option( 'TWITTER_CONSUMER_SECRET', $_POST['consumer_secret'] );
update_option( 'TWITTER_SCREEN_NAME', $_POST['screen_name'] );
$this->twitter_authenticate(true);
}
?>
<div class="twitter-admin-options">
<h1>Google Map Options</h1>
<form name="options" method="POST" action="<?php echo $_SERVER['REQUEST_URI']; ?>">
<label for="screen_name">Screen Name<span class="required">(*)</span>: </label>
<input type="text" name="screen_name" value="<?php echo get_option( 'TWITTER_SCREEN_NAME', '' ); ?>" size="70">
<br />
<label for="consumer_key">Consumer Key<span class="required">(*)</span>: </label>
<input type="text" name="consumer_key" value="<?php echo get_option( 'TWITTER_CONSUMER_KEY', '' ); ?>" size="70">
<br />
<label for="consumer_secret">Consumer Secret<span class="required">(*)</span>: </label>
<input type="text" name="consumer_secret" value="<?php echo get_option( 'TWITTER_CONSUMER_SECRET', '' ); ?>" size="70">
<br />
<label for="bearer_token">Bearer Token: </label>
<input type="text" disabled value="<?php echo get_option( 'TWITTER_BEARER_TOKEN', '' ); ?>" size="70">
<br />
<input class="button-primary" type="submit" name="save" />
<br/>
<small>You can sign up for a API key <a href="https://dev.twitter.com/" target="_blank">here</a></small>
</form>
<br />
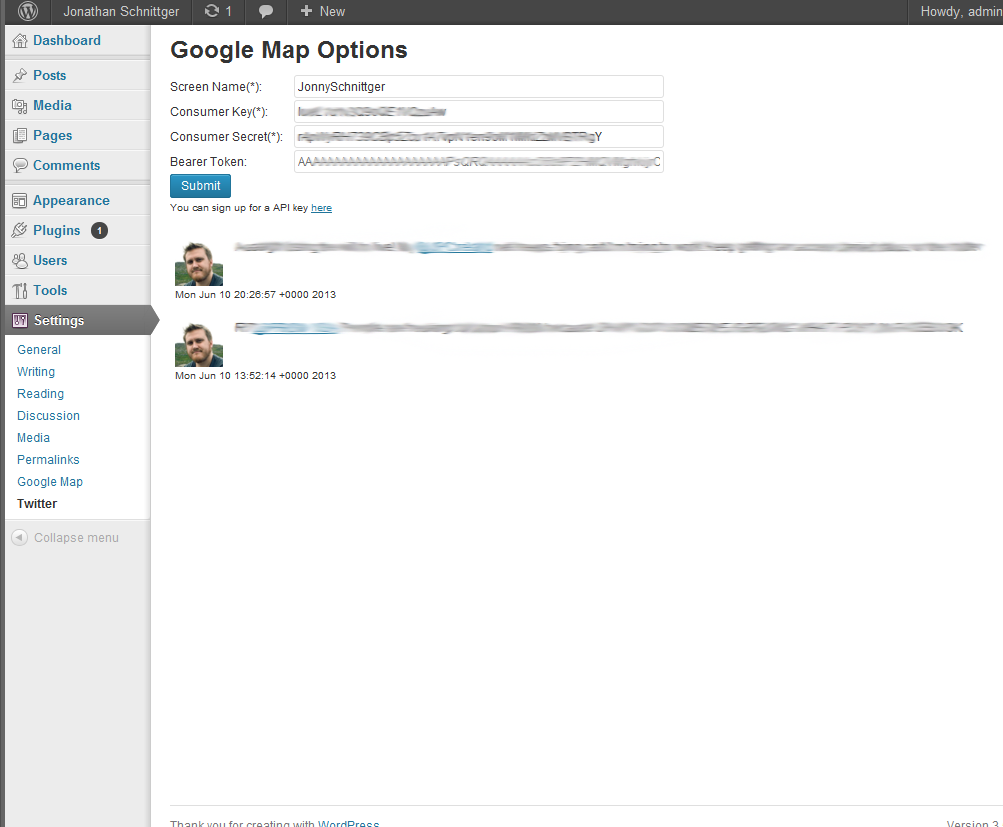
<?php echo do_shortcode('[tweets]'); ?>
</div>
<?php
}
In the above code, you will see a reference to the twitter_authenticate function. This function is where will with authenticate with twitter using the provided keys. The OAuth process is quiet simple, all it requires is that we concatenate our key and secret values together with a colon ‘:’ between them, we then base64 encode them. This string becomes our credential and using the wp_remote_post function we can request a ‘bearer token’.
The OAuth request requires certain headers, these are very easy to specify in the wp_remote_post call. First we need to set the HTTP version to 1.1, we’re also going to specify 2 headers. The ‘Authorization’ header must be set to ‘Basic [credential]’, the next header is the ‘Content-Type’. This has to be set to ‘application/x-www-form-urlencoded;charset=UTF-8’. Finally, we set our body. This specifies the type of authentication we are using.
$args = array(
    'method' => 'POST',
    'httpversion' => '1.1',
    'headers' => array(
        'Authorization' => 'Basic ' . $credentials,
        'Content-Type' => 'application/x-www-form-urlencoded;charset=UTF-8'
    ),
    'body' => array( 'grant_type' => 'client_credentials' )
);

$response = wp_remote_post( 'https://api.twitter.com/oauth2/token', $args );
If the request is successful, the body element of the response array will contain an access token. Using the json_decode function we can now parse the token out and store it.
public function twitter_authenticate($force = false) {
    $api_key = get_option( 'TWITTER_CONSUMER_KEY' );
    $api_secret = get_option( 'TWITTER_CONSUMER_SECRET' );
    $token = get_option( 'TWITTER_BEARER_TOKEN' );

    if($api_key && $api_secret && ( !$token || $force )) {
        $bearer_token_credential = $api_key . ':' . $api_secret;
        $credentials = base64_encode($bearer_token_credential);

        $args = array(
            'method' => 'POST',
            'httpversion' => '1.1',
            'blocking' => true,
            'headers' => array(
                'Authorization' => 'Basic ' . $credentials,
                'Content-Type' => 'application/x-www-form-urlencoded;charset=UTF-8'
            ),
            'body' => array( 'grant_type' => 'client_credentials' )
        );

        add_filter('https_ssl_verify', '__return_false');
        $response = wp_remote_post( 'https://api.twitter.com/oauth2/token', $args );

        $keys = json_decode($response['body']);

        if($keys) {
            update_option( 'TWITTER_BEARER_TOKEN', $keys->{'access_token'} );
        }
    }
}
Rendering the shortcode
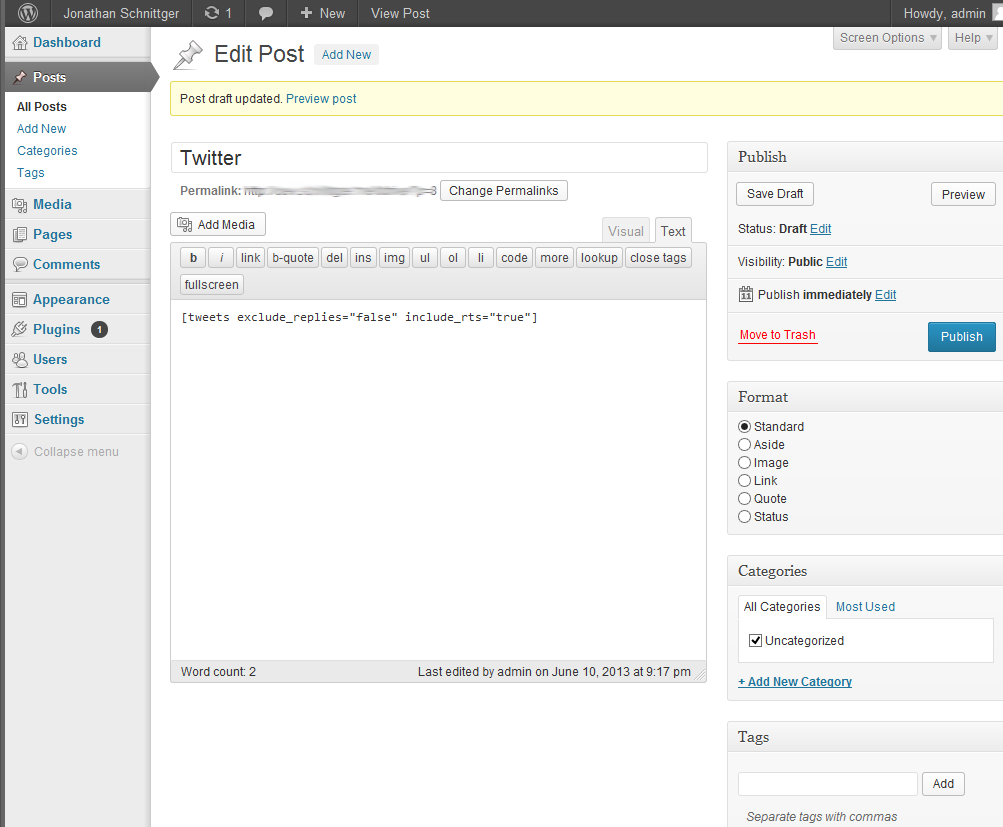
Now that we can save our settings and retrieve our authentication token, we can render our shortcode. First we’ll need to specify our default parameters. To do this we use the extract and shortcode_atts functions. We then need to get our token and the screen name we wish to display from the options table.
extract( shortcode_atts( array(
    'id' => 'tweets-1',
    'count' => '10',
    'exclude_replies' => '1',
    'include_rts' => '1'
), $atts ) );

$token = get_option( 'TWITTER_BEARER_TOKEN' );
$screen_name = get_option( 'TWITTER_SCREEN_NAME' );
If both have been set, we can start building our User Timeline request (if you’re writing an app, you would probably use the Home Timeline).
To make the request, this time we will be using the wp_remote_get function. Once again we set the http version and the Authorization header. This time the Authorization header is set to ‘Bearer [token]’.
$args = array(
    'httpversion' => '1.1',
    'blocking' => true,
    'headers' => array(
        'Authorization' => "Bearer $token"
    )
);
add_filter('https_ssl_verify', '__return_false');
$api_url = "https://api.twitter.com/1.1/statuses/user_timeline.json?screen_name=$screen_name&count=$count&exclude_replies=$exclude_replies&include_rts=$include_rts";

$response = wp_remote_get( $api_url, $args );

$tweets = json_decode($response['body']);
If the request is successful we now have a collection of tweets. If your wp_remote_get and wp_remote_post requests are failing, they return a WP_Error object in the event of a failure, you can use the following code to debug them
if ( is_wp_error($response) )
   echo $response->get_error_message();
One common error that can happen in hosted environments is that your local cert might be expired or invalid, you can get around this issue by using the below code. It should be noted, that this is not a long term fix, you should contact your hosting provider and get them to re-issue or update the certificate.
add_filter('https_ssl_verify', '__return_false');
$response = wp_remote_get( $api_url, $args );
Parsing the Twitter JSON results
The Twitter JSON can be a little complicated, it breaks out the tweet in to it’s basic component parts. Each tweet entry has a block called ‘entities’, entities are any hashtags, urls or users in the text of the tweet. The actual text of the tweet does NOT contain any hyper-links and is just the plain text of the tweet. Each entity has the ability to specify where it is the text using a start and end index. In practice this is useless as as soon as you edit the text and replace an entity e.g. a hashtag with an url, the index positions change and are now wrong. It is much easier to use the str_replace function and replace the values directly.
First we loop through each tweet, and then inside we loop through each type of entity and then finally each entity. The last loop actually replaces the plain text urls/hashtags/users with hyper-links. Once we have all of the values we need and have finished updating the text, we append it to our return variable.
$return .= "<ol id='$id' class='tweets'>";
foreach($tweets as $i => $tweet) {
    $text = $tweet->{'text'};

    foreach($tweet->{'entities'} as $type => $entity) {
        if($type == 'urls') {
            foreach($entity as $j => $url) {
                $update_with = '<a href="' . $url->{'url'} . '" target="_blank" title="' . $url->{'expanded_url'} . '">' . $url->{'display_url'} . '</a>';
                $text = str_replace($url->{'url'}, $update_with, $text);
            }
        } else if($type == 'hashtags') {
            foreach($entity as $j => $hashtag) {
                $update_with = '<a href="https://twitter.com/search?q=%23' . $hashtag->{'text'} . '&src=hash" target="_blank" title="' . $hashtag->{'text'} . '">#' . $hashtag->{'text'} . '</a>';
                $text = str_replace('#'.$hashtag->{'text'}, $update_with, $text);
            }
        } else if($type == 'user_mentions') {
            foreach($entity as $j => $user) {
                $update_with = '<a href="https://twitter.com/' . $user->{'screen_name'} . '" target="_blank" title="' . $user->{'name'} . '">@' . $user->{'screen_name'} . '</a>';
                $text = str_replace('@'.$user->{'screen_name'}, $update_with, $text);
            }
        }
    }
    $user = $tweet->{'user'};
    $return .= "<li>";
    $return .= "<img src='" . $user->{'profile_image_url'} . "' alt='" . $user->{'name'} . "' /><div class='tweet'>" . $text . "</div>";
    $return .= "<div class='tweet-date'>" . $tweet->{'created_at'} . "</div>";
    $return .= "</li>
    ";
}
$return .= "</ol>";
Styling our timeline
Now all that is left is to style our timeline, we do that by registering our style using the wp_register_style function and enqueue it with wp_enqueue_style.
public function enqueue_twitter_style() {
    $token = get_option( 'TWITTER_BEARER_TOKEN' );
    $screen_name = get_option( 'TWITTER_SCREEN_NAME' );

    if($token && $screen_name) {
         wp_register_style( 'twitter-style', get_template_directory_uri() . '/twitter.css');

         wp_enqueue_style( 'twitter-style' );
    }
}