If you want to measure your site’s traffic data then you’ll be hard-pressed to find a tool better than Google Analytics. It’ll give you all kinds of information about your visitors and how they interact with your site.
In this post, we’ll take a look at why you should use Google Analytics on your WordPress website and show you how you can get started. Hopefully, by the time you’re done reading this post, you’ll have Google Analytics installed on your website and have an idea of which metrics you should be tracking.
Let’s get started!
Why You Should Be Using Google Analytics
As a website owner you’ve probably spent a considerable amount of time wondering how your audience finds your website, what do they do once they land on it, and how you can help them get the most value out of it.
Google Analytics is a powerful analytics tool that is designed to help you understand your site’s performance and effectiveness. It gives you information that can potentially help you maximize your online marketing efforts and increase conversion rates. If you’re still not convinced then here are a few more compelling reasons to start using Google Analytics:
- Make informed decisions. With Google Analytics you can track all kinds of traffic and user behavior data which you can use to optimize your site’s design and content.
- Create customizable reports. Google Analytics comes with five different report types right out of the box. In addition to this, you can set up your own custom reports by using its drag and drop interface.
- Real-time data. Google Analytics’ real-time reports allow you to see visitors interact with your website in real-time. Wouldn’t it be neat to see how many visitors were active on your site any time you wanted?
Now that you have a fair understanding of what Google Analytics is and why it’s a good idea to use this web service, let’s take a look at how you can install it to your WordPress website.
How to Install Google Analytics on Your WordPress Website
While the possibilities on offer with Google Analytics can be overwhelming, getting started with it is anything but. In this section, we’ll show you how you can install Google Analytics on your WordPress website and begin tracking traffic metrics.
Step 1: Create a Google Analytics Account
The first thing you’ll need to get started is a Google Analytics account. If you already have a Google account that you use for other Google services (like Gmail or YouTube) then you can use that to create an account with Google Analytics. And if you don’t then you’ll need to create one first before you can move on with this tutorial.
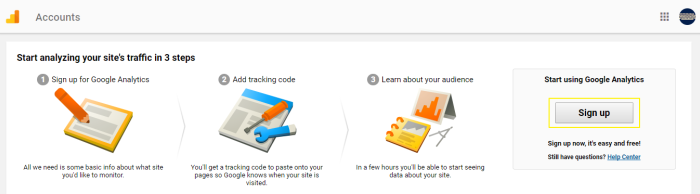
To get started navigate to Google Analytics homepage and click on Sign In > Analytics.

Once you’ve logged in with your Google account, you’ll be able to sign up for Google Analytics by clicking the Sign up button on the following screen.
Next, you’ll be asked to fill out some details for your new account. Let’s step through the required input fields one by one. First off, you’ll need to select a property to track (either a website or a mobile app) and set it up. Because we’re trying to install Google Analytics on our WordPress website, we’ll go with Website.
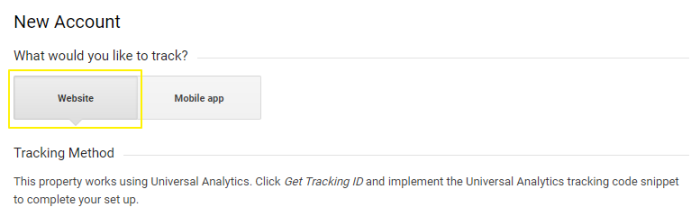
Once you’re done with that, fill out the form under the Setting up your account section and hit the Get Tracking ID button at the bottom of the page to continue.

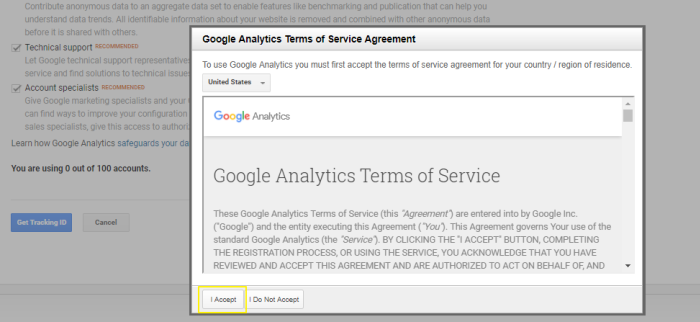
You’ll see a pop-up window on your screen prompting you to accept the Google Analytics Terms of Service Agreement. Click the I Accept button to proceed.
At this stage your Google Analytics account is set up. All that’s left to do now is link it to your WordPress website so you can begin tracking its traffic metrics. In order to do this, you’ll need your Tracking ID and Website Tracking code.
![]()
From the following screen, grab your Tracking ID and JavaScript code from under the Website Tracking section and paste it in a text file.
Step 2: Add the Analytics Code to Your Site
Now that you’ve signed up with Google Analytics and have your tracking ID and code in hand, it’s time to insert it into your website.
Theoretically, you need to add the tracking code to every single page on your website that you’d like to track. The good news, however, is that with WordPress you can simply add the code to your site’s header and it will automatically apply it to all of your pages.
There are two ways you can go about doing this – by using a plugin and doing it manually.
Using a Plugin
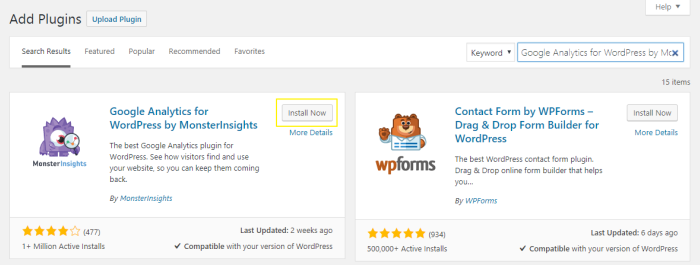
Log in to your WordPress website and navigate to Plugins > Add New. Search for the Google Analytics for WordPress by MonsterInsights plugin. Once you’ve found it, install and activate it to your WordPress website.
Now head over to Insights > Settings from the sidebar menu and click on the Authenticate with your Google account button.
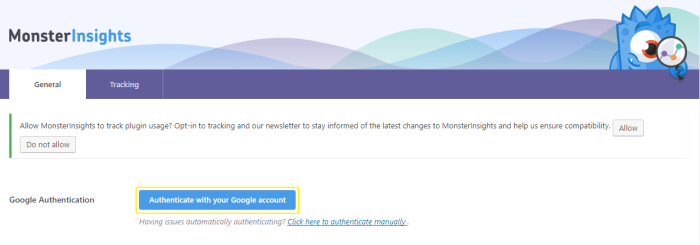
Once you do that, you’ll see a pop-up wizard appear on your screen that will walk you through three steps to authenticate your Google Analytics account. Click Next.

On the following screen, you’ll be asked to enter your Google Code. Click on the Click To Get Google Code button to grab your code and then paste it into the text area. Note: This code is different from your tracking ID/tracking code. Click Next to continue.

In the last step, you’ll be prompted to select the property that you created in Step 1 of this tutorial. It’s tracking ID should match the one you have saved in your text file. Select the analytics profile and then click the Next button to continue.

Be sure to click the Save Changes button at the bottom of the screen. That’s it! Google Analytics is now installed to your WordPress website.
Doing It Manually
If you’d rather not install a plugin for something as simple as inserting some code into your site’s header then you can always just do it manually. Here’s how:
Log in to your WordPress website and navigate to Appearance > Editor from your site’s dashboard. On the right side of the page you’ll notice a bunch of files listed under the Templates section. Find your theme’s Theme Header (header.php) file and open it up in the editor window.
Finally, find the </head> tag and paste your Google Analytics tracking code right above it. It should look something like this:
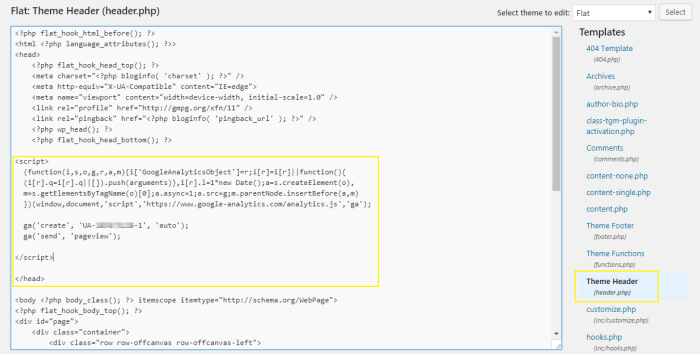
Click the Update File button to save changes.
Step 3: Analyze Collected Data
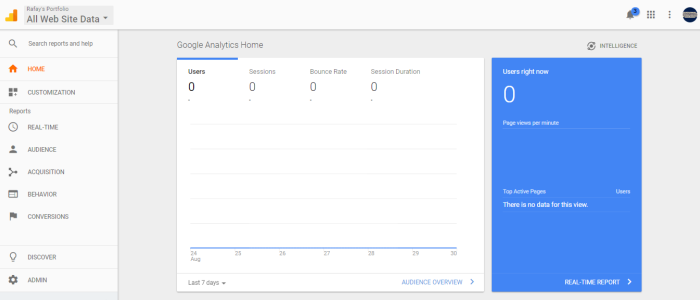
Now that your WordPress website is linked to your Google Analytics account, you can head over to the Google Analytics dashboard to view traffic data. Alternatively, if you used the plugin to install Google Analytics then you can simply head over to Insights > Dashboard from your site’s admin panel.
It’s important to understand that Google Analytics needs a minimum of 24 hours (starting from when you add the code to your site) to gather data. We recommend that you check back in a few days to view the analytics reports. Speaking of which…
Which Google Analytics metrics do you need to keep an eye out for? Although the metrics you need to analyze depend mostly on the nature of your website and what your conversion goals are, there are a few key metrics that remain pretty much the same across the board.
For instance, the Sessions metric tells you how many interactions took place over a given period of time. And if you’d like to know how many visitors bounced off immediately after landing on your site then you’ll want to track your site’s Bounce Rate. In addition to these, you may also want to measure metrics pertaining to your site’s audience such as Average Session Duration, Demographics, Page views, etc. You can also navigate to Real-Time reports to get an idea of how your visitors find your website (Traffic Sources) and set up conversion goals.
Conclusion
Google Analytics is a must-have if you want to get some insight into your site’s traffic data and find out how your audience interacts with your web pages. We encourage you to install it to your WordPress website and experiment with the different metrics, set up conversion goals, and get some invaluable information about what you can do to improve your website for your audience.