This is the second part in our introduction to HTML5’s video API. In part 1 of this series, I introduced you to the basic markup we’ll be using to play the video, then I helped set up a simple script with which we were able to make the controls visible, while ensuring that the native controls will still be visible when JavaScript is disabled.
We also touched on the use of JavaScript’s addEventListener method, along with our first look at the video API — the canplaythrough event. Let’s dig a little deeper into the API and start giving some functionality to our play/pause and mute/unmute buttons.
Playing and Pausing
With our controls visible, we’ll allow the user to play and subsequently pause the video. Here’s how we’ll do it:
playPause.bind('click', function () {
	if (video.paused) {
		video.play();
	} else {
		video.pause();
	}
return false;
});
Using jQuery’s bind() method, we’ve attached a click handler to the play/pause button. Then, in response to the click, we use a simple if statement to decide what to do. The video API’s paused attribute will be set to true if the video is in the “paused” state. So in that case, we can safely play the video. This is done by calling the play() method.
If the video is not in the paused state, then that must mean it’s in the “playing” state, so we can safely pause it. This is done using the video API’s pause() method. Finally, we return false on the click event, so the click isn’t registered within the page itself.
But what about the visual state of our play button? If the video is playing, then we want the play/pause button to look like a pause button. Let’s add some code that will do this in a rudimentary fashion:
video.addEventListener('play', function () {
	playPause.html('||');
}, false);

video.addEventListener('pause', function () {
	playPause.html('▶');
}, false);
Here we have two new events from the video API. First we’re listening for the firing of the “play” event. In response to that, we change the button’s text to a double pipe (“||” – which kind of looks like a pause button).
Next we listen for the pause event. When this fires, we change it back to a right-pointing triangle (“▶” – which kind of looks like a play button).
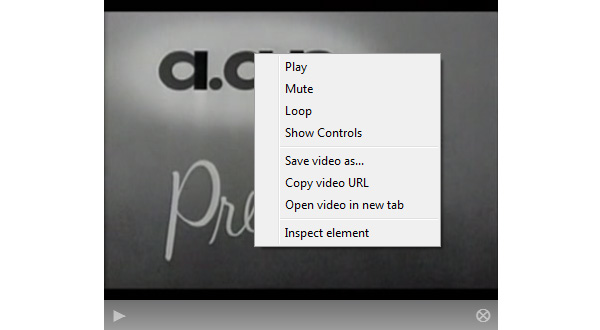
But you’re probably wondering: Why not just change the button’s visual state in the previous code block, where we responded to the click event? Well, clicking the button is not the only way to play or pause the video. The user also has the option to bring up a context menu from the video element itself, shown below:
By changing the button’s state in response to the video element’s native events, we ensure that the button will always accurately represent the proper state. It’s a little extra code, but it ensures a more usable experience.
Muting and Unmuting
The code to allow muting and unmuting of the video’s sound is somewhat similar to the code we’ve already introduced. Except this time we’ll be using two new API features: The muted attribute and the volumechange event:
muteUnmute.bind('click', function () {
	if (video.muted) {
		video.muted = false;
	} else {
		video.muted = true;
	}
return false;
});

video.addEventListener('volumechange', function () {
	if (video.muted) {
		muteUnmute.html('⊕');
	} else {
		muteUnmute.html('⊗');
	}
}, false);
The reason we listen for the “volumechange” event and not a “mute” or “unmute” event is that there are no “mute” or “unmute” events – only a “muted” attribute.
Now our video can be played, paused, muted and unmuted – all by means of our custom controls.
When the Video Ends Playback
Finally, we’ll add an event that listens for the end of video playback then sends the video back to frame one so it’s ready to be played again:
video.addEventListener('ended', function () {
	video.currentTime = 0;
	video.pause();
}, false);
Here we listen for the “ended” event, which means the video has come to the end of playback. When that fires, we set the video back to the first frame by setting its currentTime attribute to zero. Then we pause the video at this spot, so it will be ready to play again when the user desires.
Other Events and Attributes
In this two-part series, we’ve only briefly scratched the surface of the events and attributes available via HTML5’s media elements API. And in fact, what we’ve done here is just one basic way to create custom video controls. There are other events and attributes that we can utilize to have a more fine-grained approach to our media resource’s custom controls.
For example, the API includes events like progress (which fires when the browser is getting media data), stalled (when the browser unexpectedly can’t fetch the data), error (when an error occurs), loadedmetadata (when the duration and dimensions of the resource are loaded), and durationchange (when the duration of the video has been updated).
There are also attributes like seeking (which indicates whether or not the user is “scrubbing” through the video), videoTracks (which is an object containing any tracks associated with the video), duration (the length of the video), and loop (indicating whether or not the video will repeat once it ends).
As support for the video API improves, more and more developers will start using it in various ways in their projects. In fact, with the fallback solutions available, it’s ready to use today. Check out the links below for further info on the different parts of the media elements API.