Image slideshows are a dime a dozen on the web.
You see them used for advertisements, featured articles, product showcases, and plain old photo reels.
Today, we’re going to quickly implement a slideshow using the jQuery plugin Cycle by Mike Alsup.
Cycle is a great plugin with years of development behind it. We’re going to use the Lite version. It lacks some of the features of the full version (like different transitions), but it is super lightweight. While the full version is 49kb, the lite version weighs in at only 8kb.
Let’s begin by creating a project folder. Within this folder create two text files and rename them to index.html and style.css. Also, create two sub-folders named js and img. This is where we will put our javascript files and images, respectively.
Next, we’re going to need the JavaScript library jQuery and the Cycle plugin file. Download the latest version of jQuery here and Cycle here. Put them both in the js folder.
Note: If the files open in your browser as text, right-click the link and “Save as.”
Find, or create, five images for your slideshow and place them in the img folder. Make sure they are all the same size for now.
The Markup
Now, using your favorite text editor, open index.html. Paste the following code in:
<!DOCTYPE HTML>
<html lang="en">
<head>
    <meta charset="UTF-8">
    <title></title>
    <link rel="stylesheet" type="text/css" href="style.css"/>
</head>

<body>

    <div>

    </div><!-- end container -->

</body>
</html>
The above code sets up a basic HTML file and includes our stylesheet. We also need to include our JavaScript files. Before the closing head tag, include the following lines:
<script src="js/jquery-1.6.2.min.js"></script>
<script src="js/jquery.cycle.lite.js"></script>
Now index.html should look like this:
<!DOCTYPE HTML>
<html lang="en">
<head>
    <meta charset="UTF-8">
    <title></title>
    <link rel="stylesheet" type="text/css" href="style.css"/>
    <script src="js/jquery-1.6.2.min.js"></script>
    <script src="js/jquery.cycle.lite.js"></script>
</head>

<body>

    <div>

    </div><!-- end container -->

</body>
</html>
Let’s start adding the markup required for the slideshow. First, within container we’ll add a div with a class of slideshow. This element will contain the slide images. Include them using the img tag.
After slideshow, we’re going to add a div with a class of buttons and two span elements that will serve as slide controls.
Here is the current markup:
<!DOCTYPE HTML>
<html lang="en">
<head>
<meta charset="UTF-8">
<title></title>
<link rel="stylesheet" type="text/css" href="style.css"/>
<script src="js/jquery-1.6.2.min.js"></script>
<script src="js/jquery.cycle.lite.js"></script>
</head>
<body>
<div>
<div>
<img src="img/slide1.jpg" />
<img src="img/slide2.jpg" />
<img src="img/slide3.jpg" />
<img src="img/slide4.jpg" />
<img src="img/slide5.jpg" />
</div><!-- end slideshow images -->
<div>
<span>«</span>
<span>»</span>
</div>
</div><!-- end container -->
</body>
</html>To finish up our HTML file we need to tell the Cycle plugin to actually run. We do this using the follow code:
<script type="text/javascript">
    $(document).ready(function() {
        $('.slideshow').cycle({
            fx: 'fade',
            speed: 1000,
            timeout: 5000,
            next:   '.next_slide',
            prev:   '.prev_slide'
        });
    });
</script>
This bit of code tells the browser, “As soon as the DOM is registered, grab the slideshow element and run the cycle function with the following settings: use the fade transition effect, transition slides in 1000 milliseconds, wait before transitioning 5000 milliseconds, use the element .next_slide for the next button and the element .prev_slide for the previous button.”
Insert this code before the closing head tag.
The final index.html file should look like this:
<!DOCTYPE HTML>
<html lang="en">
<head>
<meta charset="UTF-8">
<title></title>
<link rel="stylesheet" type="text/css" href="style.css"/>
<script src="js/jquery-1.6.2.min.js"></script>
<script src="js/jquery.cycle.lite.js"></script>
<script type="text/javascript">
$(document).ready(function() {
$('.slideshow').cycle({
fx: 'fade',
speed: 1000,
timeout: 5000,
next: '.next_slide',
prev: '.prev_slide'
});
});
</script>
</head>
<body>
<div>
<div>
<img src="img/slide1.jpg" />
<img src="img/slide2.jpg" />
<img src="img/slide3.jpg" />
<img src="img/slide4.jpg" />
<img src="img/slide5.jpg" />
</div><!-- end slideshow images -->
<div>
<span>«</span>
<span>»</span>
</div>
</div><!-- end container -->
</body>
</html>The Styles
Now, open the style.css file. Before applying any styles, we should paste in CSS “reset” code. This zeros out the default settings for HTML elements, ensuring that different browsers are all working from the same starting point.
Note: For some more information on CSS resets read this and this.
Here is our style.css with reset code:
/*  Reset Styles  */

html, body, div, span, applet, object, iframe,
h1, h2, h3, h4, h5, h6, p, blockquote, pre,
a, abbr, acronym, address, big, cite, code,
del, dfn, em, img, ins, kbd, q, s, samp,
small, strike, strong, sub, sup, tt, var,
b, u, i, center,
dl, dt, dd, ol, ul, li,
fieldset, form, label, legend,
table, caption, tbody, tfoot, thead, tr, th, td,
article, aside, canvas, details, embed,
figure, figcaption, footer, header, hgroup,
menu, nav, output, ruby, section, summary,
time, mark, audio, video {
    margin: 0;
    padding: 0;
    border: 0;
    font-size: 100%;
    font: inherit;
    vertical-align: baseline;
}
article, aside, details, figcaption, figure,
footer, header, hgroup, menu, nav, section {
    display: block;
}
body {
    line-height: 1;
}
ol, ul {
    list-style: none;
}
blockquote, q {
    quotes: none;
}
blockquote:before, blockquote:after,
q:before, q:after {
    content: '';
    content: none;
}
table {
    border-collapse: collapse;
    border-spacing: 0;
}

/*  Main Styles  */
Below the Main Styles comment we will start adding some styling. First, we'll add a background color to the whole page. I chose a very light gray:
body {
 background: #f5f5f5;
}
Then, let’s center our container and add a width. Our slides are 940px wide, so we’ll use that for the width. Padding is also included to push the element away from the top of the page.
.container {
 width: 940px;
 margin: 0 auto;
 padding: 100px 0;
}
Note: Setting the margins to auto for the left and right sides will automatically center the div.
Next, we’ll set the dimensions of the slideshow element to the size of the images.
.slideshow {
 width: 940px;
 height: 400px;
}
Using the same method as we did with the container, we’ll center our buttons element.
.buttons {
 width: 100px;
 margin: 0 auto;
}
To position each control, we can use floats to push them to opposite sides of the buttons element.
.prev_slide {
 float: left;
}

.next_slide {
 float: right;
}
This is how an image in our slideshow currently looks:
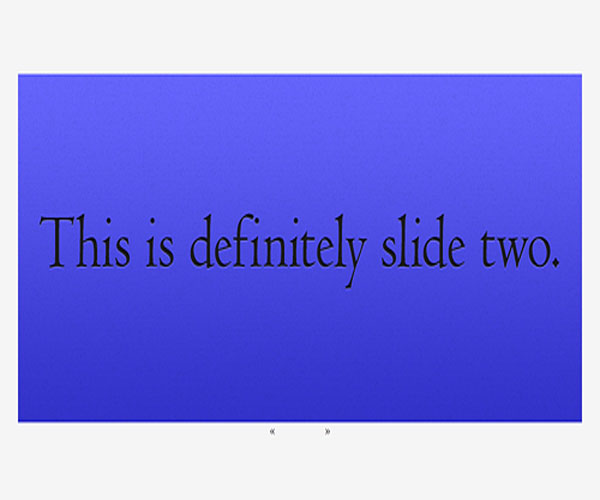
Let’s go back in and add some styles that will make it look a little more interesting. We’ll use the CSS3 property box-shadow to add a slight drop shadow beneath our slides.
.slideshow {
 width: 940px;
 height: 400px;

 -moz-box-shadow: 0px 0 10px #666; /* FF3.5+ */
 -webkit-box-shadow: 0px 0 10px #666; /* Saf3.0+, Chrome */
 box-shadow: 0px 0 10px #666; /* Opera 10.5, IE9, Chrome 10+ */
}
Note: Certain CSS3 properties require a vender predix (-moz-, -webkit-, etc) in order for browsers to recognize them.
Let’s also make our buttons stand out a bit more. Insert the following code. (Again, take note of the vender prefixes required for border-radius.)
.buttons span {
 background: #999;
 height: 30px;
 width: 30px;
 margin: 10px 0;
 font-size: 20px;
 text-align: center;
 line-height: 25px;
 text-shadow: 0 1px 0 #ccc;
 cursor: pointer;

 -webkit-border-radius: 20px;
 -webkit-border-top-right-radius: 10px;
 -webkit-border-bottom-left-radius: 10px;
 -moz-border-radius: 20px;
 -moz-border-radius-topright: 10px;
 -moz-border-radius-bottomleft: 10px;
 border-radius: 20px 10px;
}
Finally, we’ll add a hover state so users can tell when their mouse is over a button.
.buttons span:hover {
 background: #ccc;
}
That’s it. Our images look a bit more interesting now.

Here is the final code in style.css:
/*  Reset Styles  */

html, body, div, span, applet, object, iframe,
h1, h2, h3, h4, h5, h6, p, blockquote, pre,
a, abbr, acronym, address, big, cite, code,
del, dfn, em, img, ins, kbd, q, s, samp,
small, strike, strong, sub, sup, tt, var,
b, u, i, center,
dl, dt, dd, ol, ul, li,
fieldset, form, label, legend,
table, caption, tbody, tfoot, thead, tr, th, td,
article, aside, canvas, details, embed,
figure, figcaption, footer, header, hgroup,
menu, nav, output, ruby, section, summary,
time, mark, audio, video {
    margin: 0;
    padding: 0;
    border: 0;
    font-size: 100%;
    font: inherit;
    vertical-align: baseline;
}
article, aside, details, figcaption, figure,
footer, header, hgroup, menu, nav, section {
    display: block;
}
body {
    line-height: 1;
}
ol, ul {
    list-style: none;
}
blockquote, q {
    quotes: none;
}
blockquote:before, blockquote:after,
q:before, q:after {
    content: '';
    content: none;
}
table {
    border-collapse: collapse;
    border-spacing: 0;
}

/*  Main Styles  */

body {
 background: #f5f5f5;
}

.container {
 width: 940px;
 margin: 0 auto;
 padding: 100px 0;
}

.slideshow {
 width: 940px;
 height: 400px;

 -moz-box-shadow: 0px 0 10px #666;
 -webkit-box-shadow: 0px 0 10px #666;
 box-shadow: 0px 0 10px #666;
}

.buttons {
 width: 100px;
 margin: 0 auto;
}

.buttons span {
 background: #999;
 height: 30px;
 width: 30px;
 margin: 10px 0;
 font-size: 20px;
 text-align: center;
 line-height: 25px;
 text-shadow: 0 1px 0 #ccc;
 cursor: pointer;

 -webkit-border-radius: 20px;
 -webkit-border-top-right-radius: 10px;
 -webkit-border-bottom-left-radius: 10px;
 -moz-border-radius: 20px;
 -moz-border-radius-topright: 10px;
 -moz-border-radius-bottomleft: 10px;
 border-radius: 20px 10px;
}

.buttons span:hover {
 background: #ccc;
}

.prev_slide {
 float: left;
}

.next_slide {
 float: right;
}
Alright, I hope you guys found this tutorial helpful. Remember, this is just a very basic usage of a slideshow plugin. The Cycle plugin has many more features and there are countless other plugins out there. Good luck and I look forward to your feedback.